Pages

Sunday, July 15, 2012

Teen Scene Swap and a Story

I was part of great swap in the Cricut Circle by Renee Cooper of I Came, I Saw, I Created.  The swap was unique in that we had to choose a Teen Scene paper doll from the cartridge. If you joined all the groups (which were sorted by name: Sarah, Chloe, Molly, Alex, and Tyler), you got 100 dolls!  I joined 2 groups: Sarah and Tyler.  I wanted to join more but being pregnant... well I sort of lost my creative mojo.  At least, I think that is why...

Anyway, Renee listed a bunch of things we could do with the dolls to kind of motivate people to join in. Here are her suggestions (even if you don't have Teen Scene  they work for the Paper Doll cartridges, too):

Question: What would I do with all these dolls???

* Add a doll to a card with a sentiment...super fast, super easy for birthday cards!
* Create a title and other elements to coordinate with your doll and voila...instant inspiration for a scrapbook layout
* Laminate them for your child to play paper dolls with
* Add tongue depressors or popsicle sticks to them for puppet shows
* Create an entire photo album using the same doll for your favorite high school student
* Use for teacher's thank you cards
* Create a banner from them for your next teen event
* Mod Podge for ornaments
* Decorate a frame with them
* Add to a door hanger to designate your teen's room

Out of all of these, I thought I would only make cards and a scrapbook layout or two. My son is only a year and a half so he cannot possibly play with them, right?  Wrong! 

I wasn't careful where I put my Teen Scene Dolls after opening them and he got a hold of three.  He put a Sarah and a Tyler in his toy convertible and they were off into the sunset looking like Ken and Barbie. :)

Anders makes smile.   I was trying to get them back from him at first.  But it wasn't happening so I finally sat down and played with him. Vroom! Vroom!


While we try to teach our children all about life, Our children teach us what life is all about. ~Angela Schwindt


Sunday, May 6, 2012

A Peter Rabbit Mother's Day


I made another Mother's Day card for my mom.  Ever since I saw this stamp, I have been wanting to use it for this very purpose.  I reminds me of my son and my mom :)  She will love it I think especially since it will be from her grandson.  Would you believe the stamp is from Peter Rabbit: Winter Wishes, a Christmas set?  It is such a great image you can use is for anything.  The "Mother" sentiment is from Papertrey Ink.

I loved the colors in the Shabby Tea Room Blog.  It is one of my favorite color combinations because it is so pretty and feminine.  If I ever have a girl, her room would be these colors.  The challenge also called for flowers which is in the pattern paper and polk dots.  I made a flower using ribbon which I learned in a class by Melissa Frances. The green floral pattern paper and pink pattern paper is Pink Paisley and the green polka dot paper is from Graphic 45.  The blue cardstock is from Bazille.

I cut the circle and scalloped circle using the Sugar and Spice Cricut cartridge by Provocraft. 
I used Tim Holtz Distress Markers and Detail Brush to to color Peter Rabbit and his mom.  I used: Stormy Sky, Weathered Wood, Tea Dye, Vintage Photo, and Milled Lavender.  I inked the edges with Victorian Velvet and Antique Linen.

I can't wait to give it to my mom!

I also entered:
2 Sisters Challenge Blog  - #90 Anything Goes
Sweet Stampin Challenge Blog - 4 Legged Friends - my little rabbits
Simon Say Stamp and Show - Kaleidoscope of Color - I have pinks, greens, blues, browns, lavender, gray and white.  It's amazing how well they all work together :)
Crafts and Me Challenges - favorite color combos - pink and green
Paper Sundaes - Mother's Day, Challenge 119
Dream Valley - Challenge 31, For a Special Lady
Little Miss Muffet Challenges - May Flowers, Challenge 34
Creative Crafts Challenges2 - Anythings Goes

Saturday, April 21, 2012

Happy Purr-day!


I have to admit: This was a challenging card to make.  But it was fun, too.  Does that make sense?  :)  I saw a challenge at Bitten by the Bug 2 to use balloons in a birthday card and I couldn't get the image of cats playing with the balloons out of my mind.  So I pulled out my Meow Cricut Lite Cartridge and went to town with it!

I didn't think a regular A6 card would do the trick to show the playfulness of the cats so I made a step ladder card.  I used the instructions from this video:  Andrea Walford.  I'm a visual kinda gal.

I also entered this card in:
Paper Playtime - Say It with Sentiments, Challenge 72

I Used:
- Meow Cricut Lite Cartridge, Provocraft - cats and "Purr"
- From My Kitchen Cricut Cartridge, Provocraft - cake and stand
- Martha Stewart Birthday Cakes, Provocraft 
  •  balloons
  • "day" welded in the Gypsy - What a fun font!
  • all the letters in HAPPY
- Ice White Pearl Pen, Viva Decor
- Floral wire stems, Floral Soft
- Pink Pattern Paper, SEI
- Light Blue Paper used as the base of the step ladder card - Stampin' Up
- All other paper from my scrap stash


This naughty kitty got his paws on the cake. 
I swapped out the original fish bowl.

This little kitty is all tied up!

Friday, April 20, 2012

Vintage Mother's Day Card


I started making this card for a color challenge but I saw another one with vintage.  Blues and vintage... LOVE it! :)

The color imspiration came from: I Came, I Saw, I Created
The vintage inspiration came from: Crafts and Me, Challenge #80: Vintage

I also entered:
2 Sisters Challenge Blog - Flowers
Great Impressions Stamps - Lots of Flowers
Sweet Stampin Challenge Blog - Girly, but no pink
Simon Says Stamp and Show - Anything goes


I Used:
- Elegant Edges Cricut Cartridge, Provocraft - hearts2 + book feature at 3.6 in
   and hearts2 + book feature + shift at 3.6 in
- Vintage Papers Imagine Colors & Patterns Cartridge - second image on page 2.  I flooded the light blue cardstock with this iamge.
- Hydrangea stamp, Three Birds Estate Collection
- Perfect Pearls powder, Ranger
- Cream Pearl Pen, Viva Decor
- "Celebrate Today" sentiment - Papertrey Ink
- Fabric flowers from my stash
- All cardstock from Stampin' Up


I added Perfect Pearls powder to the hydrangea.
You can also see how the Imagine Printed on the light blue paper... Cool, huh?


The Viva Pearls were added by hand... after lots of practice!


Sunday, April 15, 2012

Welcome Little One


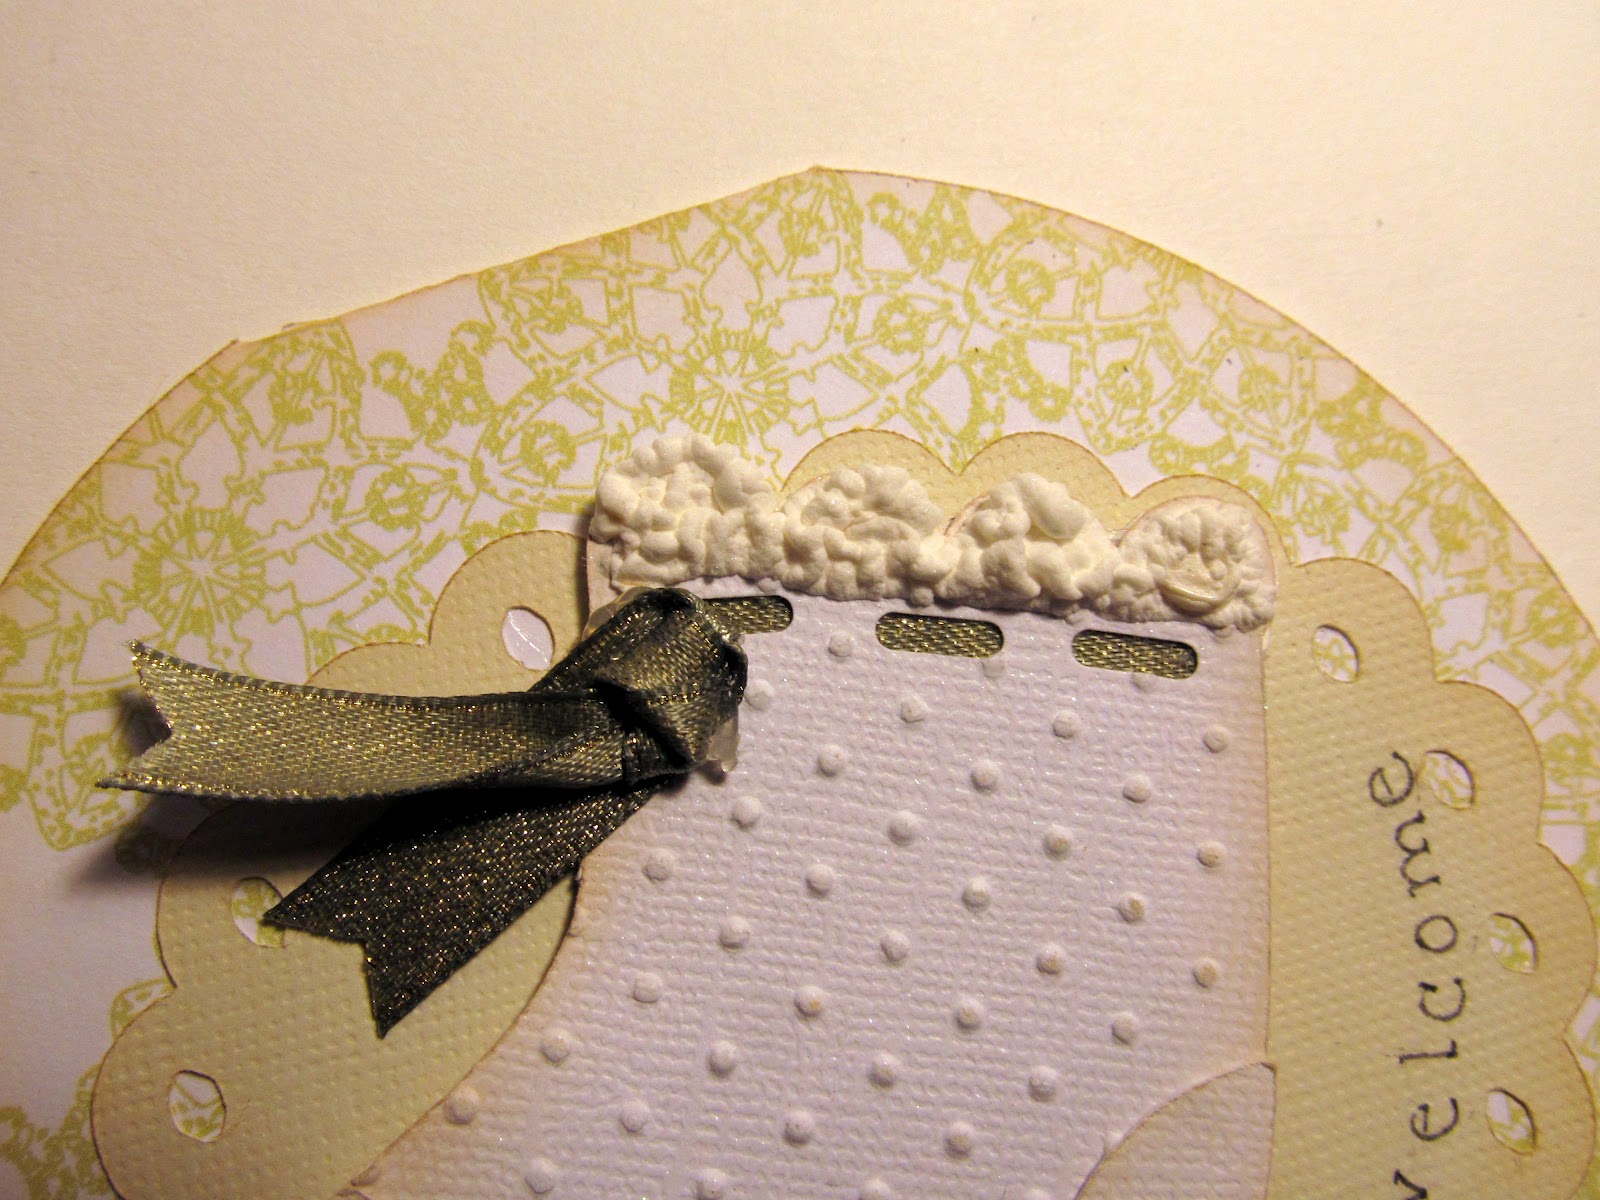
I made this card for a baby shower.  I wanted a vintage kind of look so I made a little baby bootie that reminded me of the little crochet ones my mother had made for my son before he was born.  It took a long time to make this but I really enjoyed making it. 

I Used:
- Sugar and Spice Cricut Lite, Provocraft - little baby bootie
- Art Philosophy CTMH Cricut Cartridge, Provocraft - Scalloped circle
- Liquid Applique, Marvey-  for the top of the booties 
- Swiss Dots embossing folder, Cuttlebug
- Vanilla Cream Ink Pad, Close to My Heart (CTMH) - to ink the edges
- Bissette, SEI cardstock
- Ribbon from my stash


The Liquid Applique give it a nice 3-D effect.


Sunday, April 1, 2012

Creative Chemistry 101, Day 7


Oh, this class was a lot of fun because I haven't embossed anything in years!  It was really cool to see the difference between the regular embossing powders and the distress powders.  The clear embossing powder is clear and smooth.  The distress embossing powder is rough and felt like sandpaper.  I've never used this product before  but I really like it and intend on using it again.  I think it will go well with masculine kind of projects and vintage projects, too.


I Used:

- Frayed Burlap Distress Embossing Powder, Tim Holtz, Ranger
- Festive Berries Distress Ink Pad, Tim Holtz, Ranger
- Evergreen Bough Distress Ink Pad, Tim Holtz, Ranger
- Iced Spruce Distress Ink Pad, Tim Holtz, Ranger
- Distress Embossing Ink Pad, Tim Holtz, Range
- Vintage Map Stamp, Stampabilities


Here is the one with clear embossing powder:


I Used:
- Shabby French Stamp Set, Tim Holz, Stampers Anonymous
- Vintage Map Stamp, Stampabilities
- Brushed Corduroy Distress Ink Pad, Tim Holtz, Ranger
- Victorian Velvet Distress Ink Pad, Tim Holtz, Ranger
- Antique Linen Distress Ink Pad, Tim Holtz, Ranger
- Iced Spruce Distress Ink Pad, Tim Holtz, Ranger


I used lighter colors in the background because I used a dark color to emboss.


Here's a side-by-side comparison:


Wandering re-establishes the original harmony which once existed between man and the universe. 
 ~Anatole France

Creative Chemistry 101, Day 8


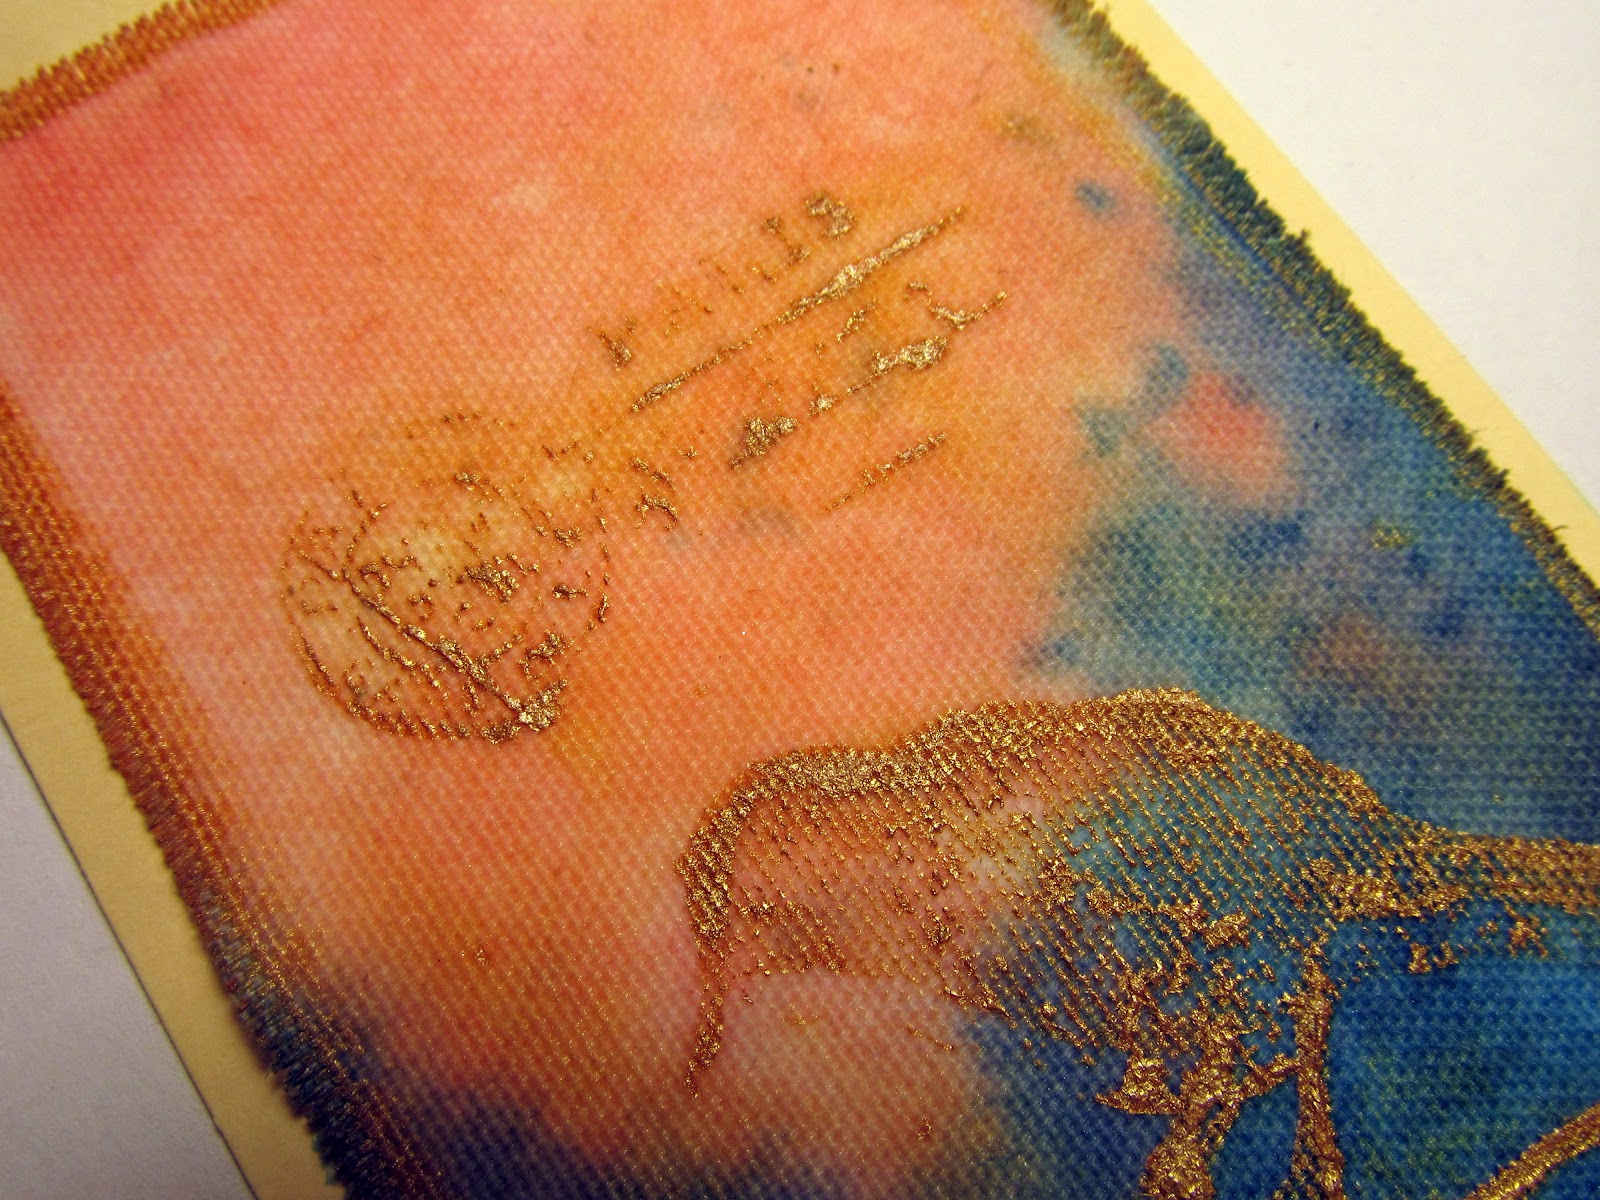
I tried out two more techniques.  This one is with the Acrylic Dabbers it is called the Paint Dabber Resist Technique.


I used Acrylic Paint Dabber in Gold.  I frayed the edges
of the Stickly-Back Canvas.


Spun Sugar and Broken China Distress Stains


I also tried the Shattered Stains Technique with Rock Candy Distress Crackle Paint.  Cool! I used Mixed Minds grungeboard by Tim Holtz Idea-ology.


I used Spun Sugar Distress Stain and Festive Berries Distress Ink.
I had to press the ink pad really hard!


I stamped the sentiment from Shabby French using Iced Spruce Distress Ink.
I also stamped the sentiment in Jet Black Archival Ink.