Pages

Showing posts with label Cuttlebug. Show all posts

Saturday, July 21, 2012

Best Wishes

This is a birthday card I made for wonderful mother-in-law. I used an SEI cardstock diecut.  The sentiment is from Crafty Secrets. The color used for the sentiment is Desert Sands from Close to My Heart.  

I thought I was done but it looked so plain!  So I thought about what I could add to keep it simple but elegant. I looked at ribbons and washi tape but none did the trick for me. Finally, I stumbled upon my Cuttlebug folders and pulled out one of my favorites from the Teresa Collins Timeless set. I only embossed the sides and it gave the umph! it needed. :)

There is hope in dreams, imagination, and in the courage of those who wish to make those wishes reality.  ~ Jonas Salk


Sunday, April 15, 2012

Welcome Little One


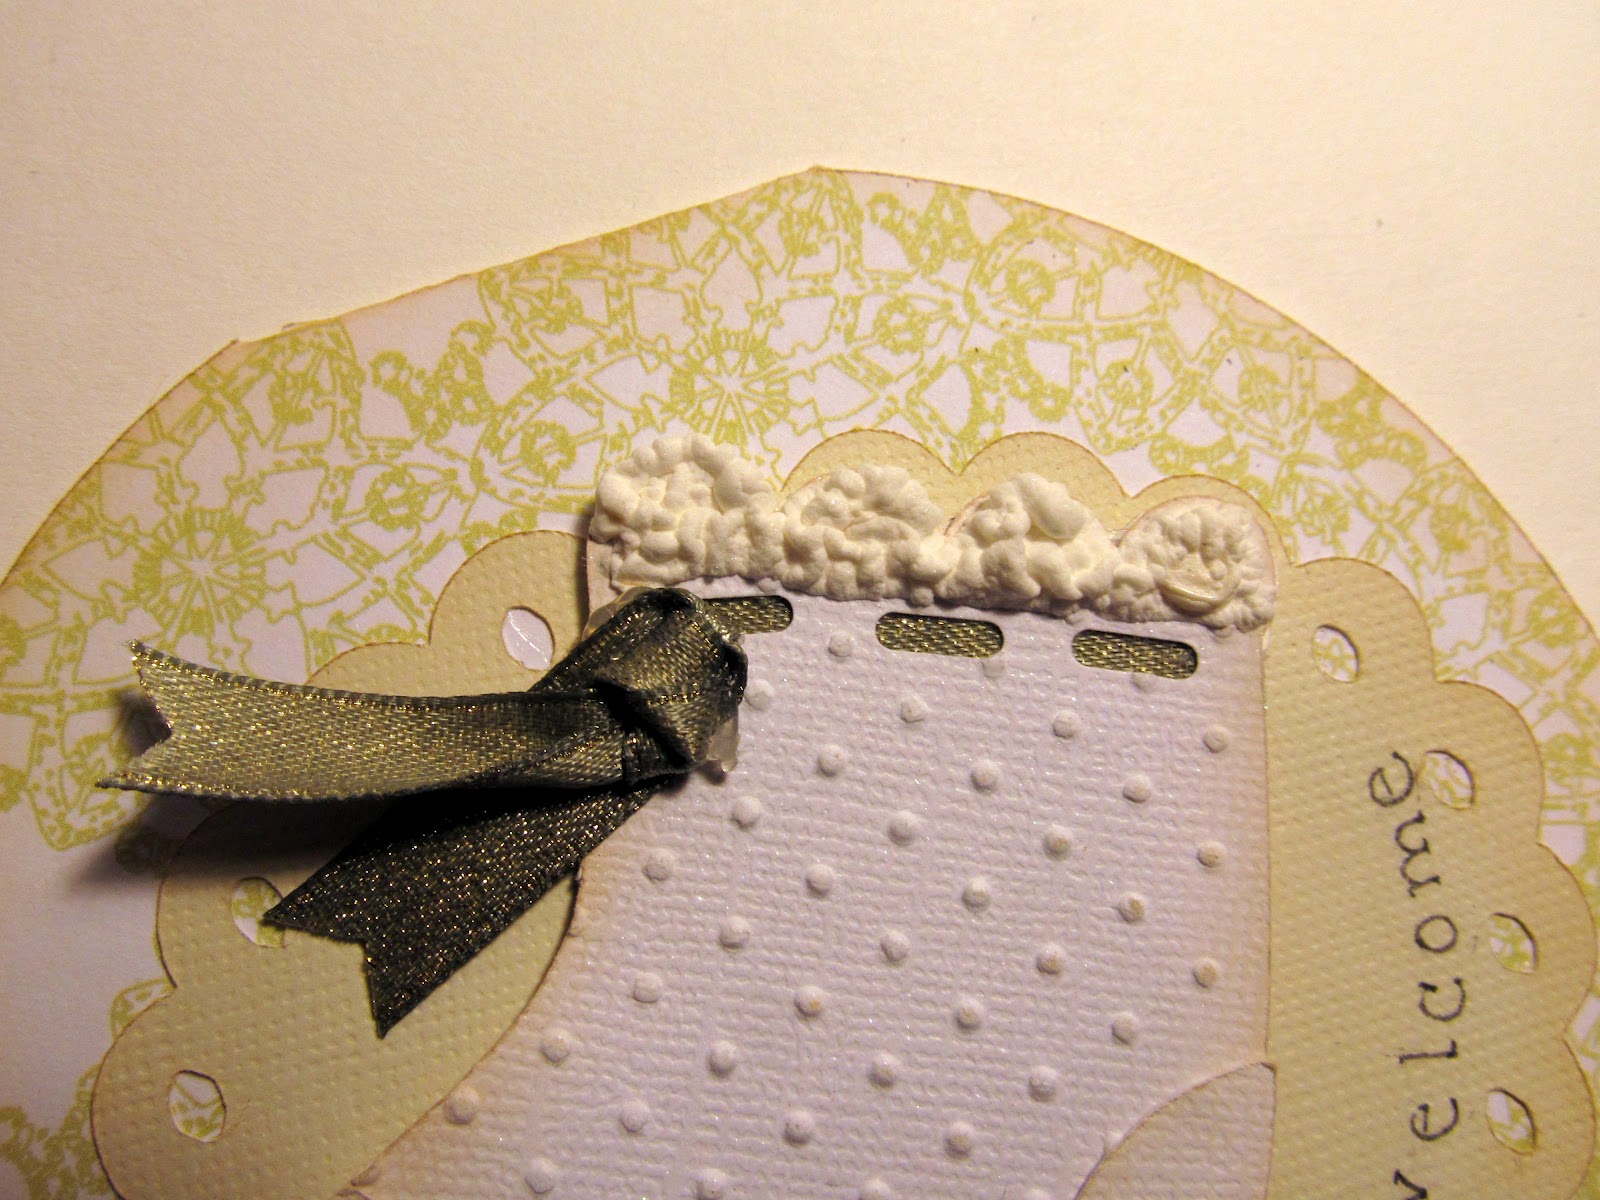
I made this card for a baby shower.  I wanted a vintage kind of look so I made a little baby bootie that reminded me of the little crochet ones my mother had made for my son before he was born.  It took a long time to make this but I really enjoyed making it. 

I Used:
- Sugar and Spice Cricut Lite, Provocraft - little baby bootie
- Art Philosophy CTMH Cricut Cartridge, Provocraft - Scalloped circle
- Liquid Applique, Marvey-  for the top of the booties 
- Swiss Dots embossing folder, Cuttlebug
- Vanilla Cream Ink Pad, Close to My Heart (CTMH) - to ink the edges
- Bissette, SEI cardstock
- Ribbon from my stash


The Liquid Applique give it a nice 3-D effect.


Sunday, March 18, 2012

For You, Your Majesty


I made this card for my dad who is ruler of all he surveys... ;)  This was a fun card to make and I used a crown and the color from challenges in the Cricut Circle Message Board. 

I Used:
- Baby Boutique Imagine Art Cartridge, 3rd icon on p. 33
- Crafty Secrets - Greetings from Wonderland stamp set
- Close to My Heart - "For You" sentiment - Card Word Puzzle stamp set - WOW! There are a lot of words you can mix and match in this set
- Cuttlebug - Musical Flourish folder
- Papertrey Ink - Kraft paper & white cardstock
- Seam binding from my own stash
- Tsukineko - Timber Brown Staz-On ink pad
- Ranger - Tim Holtz  - Distress Ink Pad - Victorian Velvet
- Ranger - Perfect Pearls
- Bazille - Red cardstock
- PrismaColor Pencils and Reeves Color Pencils
- Gamsol for Blending

Here's How:
I stamped the image on white cardstock in Timber Brown, a nice dark, espresso.  I colored the image using the color pencils and used the Gamsol to blend.  I used Victorian Velvet with the blending tool to ink the edges softly.


I cut the crown at 2.5 inches and added Perfect Pearls to make it sparkle.  Afterall, it is a crown. ;)


I dry embossed the kraft paper with Musical Flourish. 

I attached the seam binding on the side of the kraft paper and realized that I did not want white.  I had already added glue I decided to use Victorian Velvet with the blending tool.  A happy accident happened.  The ribbon picked up the embossing on the kraft paper.  How cool!!  I am going to do it on purpose from now on. I stamped "FOR YOU" on the seam binding.


"OFF WITH HER HEAD!"
Queen of Hearts, Alice in Wonderland
~Lewis Carroll

Sunday, March 11, 2012

Girl with a Shamrock


I made this card for the Bitten by the Bug 2 (BBTB2) challenge.  I used the image of the little girl holding a cat.  (p 60, Girl6, Girl6-s and all the layers)  I cut the cat out by hand with a regular scissor.  It was actually very easy to do. 

Then I added a shamrock from the Designer's Calendar cartridge.  (p30, Shift + March) I am really proud I used that cartridge because I have had it for a very long time and it is the first time I used it. 

The color of the dress, hat, flowers, and grass are all from the Cricut Imagine Hopscotch Colors and Patterns Cartridge.  First pattern on p5.  First pattern on p9.

The sentiment is from a Melissa Frances stamp set.

The kraft paper is from Papertrey Ink which is dry embossed with the Divine Swirls Folder.

I sprizted a lot of Marshmallow Mist for some shimmer - it's there I swear!

I added Stickles to the middle of the flowers and the ribbon is from my stash.  I think she came out cute.    I like to think she is making a wish. :)


May you alway walk in sunshine.
May you never want for more.
May Irish angels rest their wings right beside your door.
- Irish Blessing

Tuesday, February 28, 2012

Monogram Birthday Card


I was thinking that Damask Decor and Letter Envy Cricut Cartridges were surely made for each other. Ummm... No, they are not. I found that out after I cut out all the pieces and put it together.  What a mess! Maybe my colors were all wrong... I had white cream, seafoam green, white, orange, pink. Maybe it was all the inticate cuts slapped together.  Maybe it was all of it together.  

I had to go back to the drawing board.  I knew two things: I wanted to make a monogram card and I wanted to use orange and pink.  The orange and pink inspiration was from Paper Craft Weekend Challenge. The colors were perfect because I wanted to make a birthday card for my sister-in-law in Naples, FL.  Orange and pink reminds me of cheery South Florida and the outfit my sister-in-law wore the last day we were in Naples.  I'm entering it in the monogram challenge from Bitten by the Bug 2.

Needless to say, I simplified the card and I think it is much better :)


I Used:
Letter Envy Circut Cartridge - L-s and layer feature + L
Imagine Blossom Cricut Cartridge- Pink cardstock for the letter L - it is the perfect pale, soft pink
SEI Mimosa glitter cardstock
Cuttlebug Folder - Musical Flourish
Imaginisce orange rhinestone
Pink stamp pad to ink the edges of the all the squares and the embossed rectangle
Pop dots
Tattered Angels Marshmallow mist for sparkles - ya gotta have sparkles for a birthday!


I found a way to shoot the sparkles from the glitter mist!  I had to angle it on my hand and then take the picture.


Words for me to remember:
 Beauty of style and harmony and grace and good rhythm depend on simplicity.
~Plato

Monday, January 16, 2012

Birthday Dancer


My sister's birthday is coming up in early February so I decided to get a jump start on the card.  I have been waiting to Twinkle Toes and this was great opportunity.  She's not really into pink but I think she will not be able to resist this little dancer.

I Used:
- Cricut Twinkle Toes Cartridge - dancer3 and all layers; stfrght and stgfght-s
- Papertrey Ink (PTI) Mega Messages - Make a Wish sentiment
- Cuttlebug - Teresa Collins Timeless Embossing Folder
- Making Memories - pink ribbon
- Tim Holtz - Victorian Velvet Distress Pad
- Close to My Heart (CMTH) - Baby Pink Re-inker
- White ribbon, paper, and glitter from my stash

Here's How:
* I cut dancer3 at 4 inches and the stagfrght tags at 2 inches.  I cut an extra piece of the headband and cut out the bow so that I could fold it up and make it pop out.  But first I inked the edges with Victorian Velvet, added some glitter, and hot pink Jolee rhinestone:


* I added glitter to the little band on her outfit and put all the pieces together. 

* I inked the edges of the pink tag with Victorian Velvet and stamped Make a Wish on the white part of the tag.


* I thought the Victorian Velvet might be too strong for the edges of the embossed part of the card so I used Soft Pink by CTMH.  I squeezed a couple of drops on my mat and then used the Tim Holtz blending tool to give the paper a soft pink glow.

* I just embossed the paper using a folder from Teresa Collins Timeless Collection.  It is a set of four embossing folders.  I think they are so elegant. I think in this picture you can see it better.


* I took some white ribbon, Terrifically Tacky Tape and ruffled it up to make a ballerina skirt for my dancer.  Oops! One little piece is popping up. I'll go back to that stubborn piece later!


I added some ribbon and popped up the tag.  And that's all folks! :)

Dance like there's nobody watching,
Love like you'll never be hurt.
Sing like there's nobody listening,
And live like it's heaven on earth.
~ William W. Purkey

Monday, January 2, 2012

Dove Sympathy Card


Unfortunately, I needed to make sympathy cards for two people. Their loved ones had lived very full and long lives. To make the cards, I decided to use white on white to give the cards a sense of quiet beauty. In this picture you can see the contrast of the warm and cool whites.


I Used:
- Inpsired Heart Cartridge - Dove and oval layer: <Dove>, <Dove-s>
- Co'ordinations Pearl Paper
- White paper from my stash
- Pearls from my stash
- Crafty Secrets - Card Sentiments: In Deepest Sympathy and May prayer strengthen you and Memories comfort you- Tattered Angels - Marshmallow Mist
- Cuttlebug - Script Folder
- Dew Drop Ink - Starlight Silver

Here's How:
*I cut the Co'ordinations pearl paper at 10 by 7 to make a 5 x 7 card. I cut the dove and layer at 3.02.

*The dove was cut with the pearl paper and the oval layer was cut with plain white paper.

*I ran the oval through the cuttle bug using the script folder and then spritzed it with Marshmallow Mist. I further inked the edges with the Starlight Silver Dew Drop.

*I put the pieces together and you can see the silver in the this picture:


*I stamped the bottom right hand corner with "In Deepest Sympathy" and added pearls next to the "I" and the "S."


*Lastly, I stamped the inside with "May prayer strengthen you and Memories comfort you."


God gave us memories that we might have roses in December.  ~J.M. Barrie, 1922

Sunday, December 18, 2011

Baby Shower Card


I made this card for a baby shower for a lady at work who is having a little girl. I can't wait to see what she looks like!

I Used:
- Kate's ABC - coat and layers, page 43 - I think it looks more like a little dress :)
- Forever Young - hanger and layers, page 58; I used the Gypsy to hide the flower
- Cuttlebug Folder - Swiss Dots
- Ranger Stickles
- Ranger - Perfect Pearls
- Crafty Secrets - Congratulations sentiment
- Martha Stewart Vintage Doily Punch Around the Page Set
- Marvy - Liquid Applique
- CTMH - Liquid Glass

Here's How:
I ran the dress through the Cuttlebug using Swiss Dots and put the little dress together. The little flowers pieces were a BIG challenge! Maybe I'll try tweezers next time. I added stickles on the cuffs for buttons and in the centers of the flowers.

A butterfly goes with the dress but I used it on tag with the sentiment and on the bottom of the border. Confession time: the Vintage Doily punch did not quite line up and made more holes on the left end of the border then there was supposed to be (does that make any sense???). So I used the butterfly to cover up that boo-boo.

I brushed the pink card stock with Perfect Pearls and then glued the dress to the cardstock on an angle.

Now for the hanger: I cut it too big so I had to trim it down by hand which was okay since that part was going to be hidden. I applied the Liquid Applique not knowing what would happen but hoping for the best. I was hoping it would like those fancy hangers that are padded with satin and look a little scrunched up. I think it came out quite well :)  I ended up gluing down the hook part of the hanger - that it went up like that was just driving me crazy!

Last, I just inked the edges of the tag, stamped my sentiment and added another butterfly from the dress.